Creating an Agent
This chapter covers building an Agentflow — the core deliverable of the solution.
What Is an Agentflow
An agentflow is an AI workflow composed by visually connecting multiple nodes. The entire execution path — from the start node, through intermediate steps (LLM calls, tool execution, conditional branching, etc.), to the final response — is represented in a single diagram.
| Term | Description |
|---|---|
| Agentflow | The entire flow composed of nodes (the unit of deployment) |
| Node | A single step in the flow (LLM, tool, branch, etc.) |
| Canvas | The area for visually editing nodes |
See Glossary for full terminology.
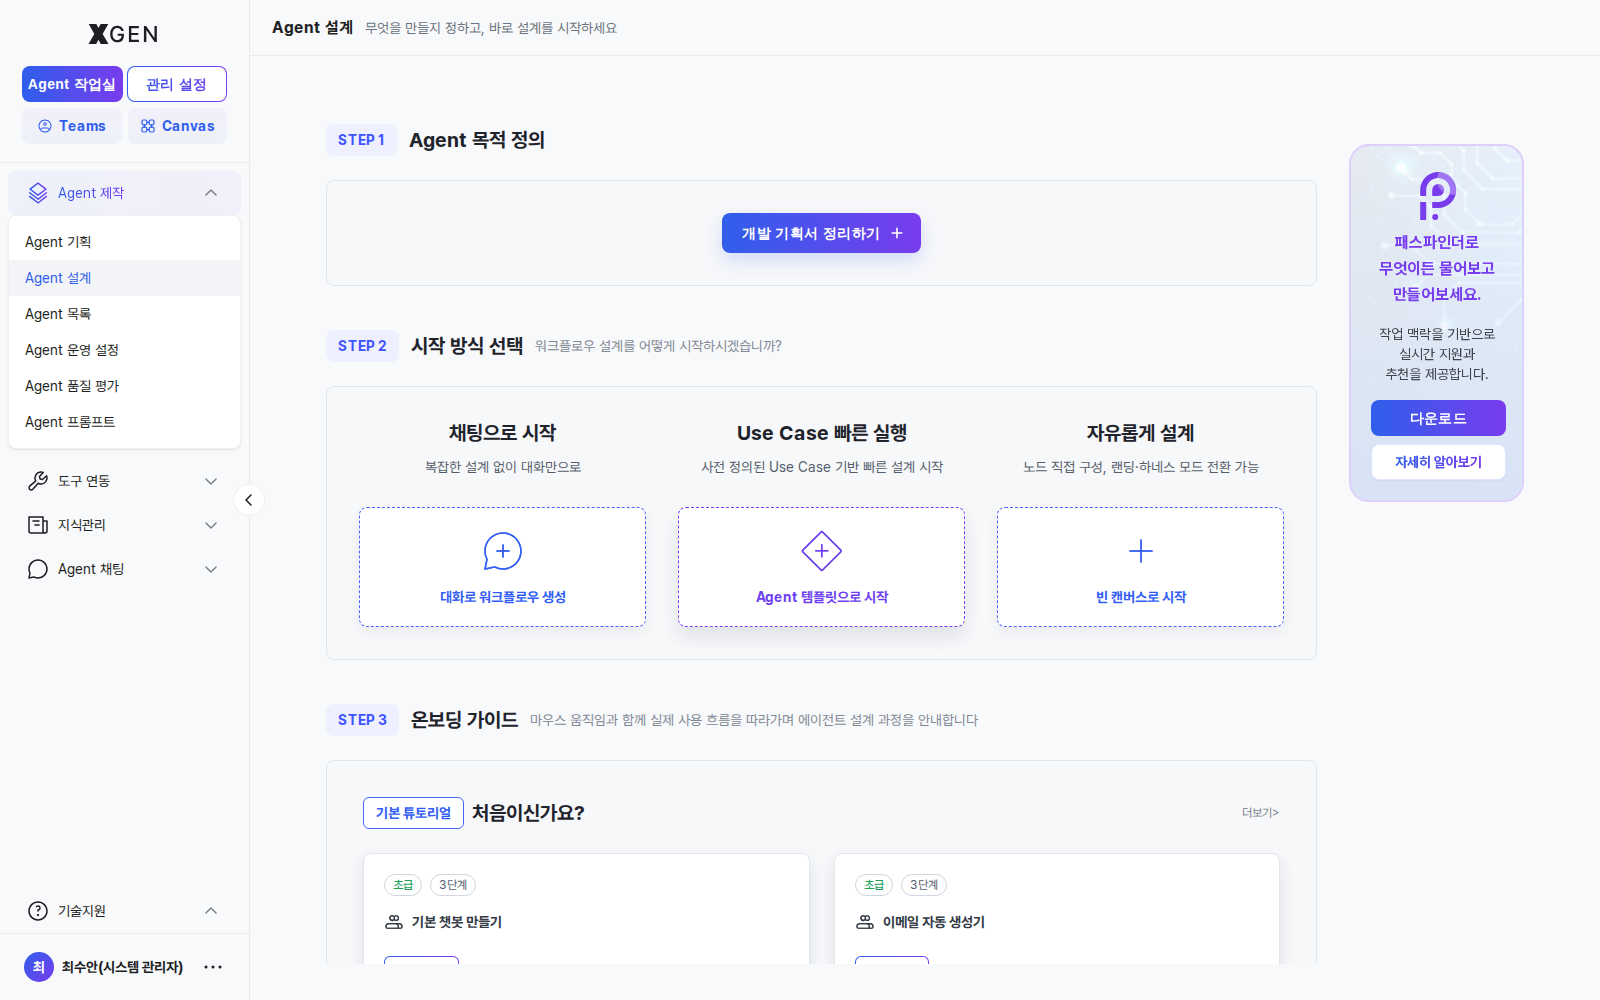
Entering Agent Workspace
Agent-build permission required
The steps in this section assume an account with the Agent Developer role (or a comparable permission). Standard User accounts do not see the Agent Creation area in the left sidebar, and even when reached via the dashboard or Agent Workspace shortcut, the related screens may not appear or access may be restricted.
Select Agent Creation → Agent Design in the left sidebar. From the canvas intro screen you can pick Start from blank canvas / Start with chat / Continue as the entry mode.
Creating a New Agentflow
- Click the + New Agentflow button at the top right
- Enter:
- Name: an identifiable name (Korean or English)
- Description (optional): one-line summary of what it does
- Create — an empty canvas opens; clicking Start Agent automatically places the XGEN Agent node.
Adding Nodes
Clicking the Node Search button at the bottom right of the canvas opens the list of available nodes, grouped by category.
| Category | Example Nodes |
|---|---|
| LLM | Model invocation, response generation |
| Knowledge Retrieval | Collection search, citation insertion |
| Tools | External APIs, MCP tools |
| Branching | Conditional, loop |
| I/O | Receive input, return output |
The full node catalog (categories, tags, detailed specs, etc.) and each node's input/output and parameter specs are available in the next Agent Node List chapter.
To add:
- Expand a node category in the sidebar
- Drag and drop a node card onto the canvas
- The node is placed on the canvas
Drag motion
Drag a node card from the left palette and drop it onto the canvas.
Connecting Nodes
Drag from a node's output port (right side) to the next node's input port (left side).
- Valid connections show as arrowed lines
- Invalid connections (type mismatch) appear gray and warn at execution time
Configuring Nodes
Clicking a node opens the detail panel on the right. Configure:
| Item | Description |
|---|---|
| Model (LLM node) | Which LLM model to use (chosen from admin-registered models) |
| Prompt | System Prompt, User Prompt |
| Collection (search node) | Target collection for retrieval |
| Tool (tool node) | The external API or MCP tool to invoke |
| Variables | Variable names passed between nodes |
Node detail panel
Clicking an individual node opens a detail panel on the right. Field composition differs per node type (LLM / Tool / Search / Branch, etc.); two representative examples are cycled below.
External APIs and MCP tools referenced by Tool nodes are registered and managed on a separate screen, under Agent Workspace → Tool Integration in the left sidebar.
Tool Integration · API Tools
Register tools from Agent Workspace → Tool Integration → API Tools. Click + New Tool at the top right of the list to open the registration form; switch between Easy Mode and Developer Mode to define your API endpoint.
Tool Integration · Auth Profiles
Credentials used by API tools to call external systems (Bearer Token, OAuth, etc.) are managed separately under Agent Workspace → Tool Integration → Auth Profiles. Click + New Profile at the top right of the list to open the Create Auth Profile form, where you fill in basic info (Service ID, Name, Auth Type, TTL) plus Auth API and Extract/Inject Rules tabs.
Tutorials
When you're new or want to pick up a new pattern quickly, open the 새 에이전트플로우 ▾ (New Agentflow) dropdown at the top left of the canvas and choose 튜토리얼 가이드로 시작 (Start with a tutorial guide) to open the Select Tutorial panel. The panel has two tabs.
Basic Tutorials
A set of scenarios pre-registered with the solution; they run without any setup. The card titles are shown in Korean in the UI; here are their meanings:
- 기본 챗봇 만들기 (Basic Chatbot) — simplest chatbot configuration
- 한영 번역 봇 만들기 (Translation Bot) — Korean ↔ English translation
- 이메일 자동 작성기 (Email Writer) — email draft generation
- 프롬프트 템플릿 활용 (Prompt Template) — using prompt template patterns
- 사내 규정 QA 챗봇 (RAG) (Internal RAG QA) — Q&A over internal documents
- 다국어 응대 봇 (Multilingual Support) — auto-detect user language and respond
- 일일 금융뉴스 브리핑 메일러 (Daily News Briefing Mailer) — news summary mailer
- 경제뉴스 분석 + AI 자체 검증 (멀티에이전트) (News Analysis with Self-Eval) — news analysis with built-in self-evaluation
Each card shows the step count and tags. You can run it two ways.
| Button | Behavior |
|---|---|
| ▶ (virtual cursor) | A virtual cursor demonstrates the flow automatically — adding, connecting, and saving nodes step by step |
| 📄 (step-by-step guide) | You operate the canvas yourself while step hints walk you through it |
Shared Tutorials
Only items you added via 공유튜토리얼 등록 (Register Shared Tutorial) from the 템플릿 (Templates) tab in Agent 목록 (Agent List) appear here. Bundling templates you reuse often as shared tutorials lets you replay the build pattern step by step later.

How to register:
- Open Agent Workspace → Agent 목록 (Agent List) in the left sidebar, then select the 템플릿 (Templates) tab at the top.
- On the template card you want to use, click 공유튜토리얼 등록 (Register Shared Tutorial).
- Open the panel from 새 에이전트플로우 ▾ → 튜토리얼 가이드로 시작 at the top left of the canvas and check the 공유 튜토리얼 (Shared Tutorials) tab.
To remove it, use the 공유튜토리얼 해제 (Unregister Shared Tutorial) button on the same template card.
Templates with nothing to demonstrate cannot be registered
A template with no nodes has nothing to demonstrate and cannot be registered as a shared tutorial.
Auto Layout
When nodes become densely arranged, use the Auto Layout feature at the bottom right of the canvas to tidy the structure.
Saving
Click Save at the top right of the canvas to persist changes. Each save creates a new version.
Next Steps
For executing, deploying, and sharing the agent (agentflow) you've built, see Agent Operations.
Contact
For questions about creating agentflows, please contact the Xgen Solution Administrator.