Agent Workspace Overview
This chapter covers what end users and Agent developers need to know upon first logging into the solution. Detailed feature usage is covered in subsequent chapters.
Access
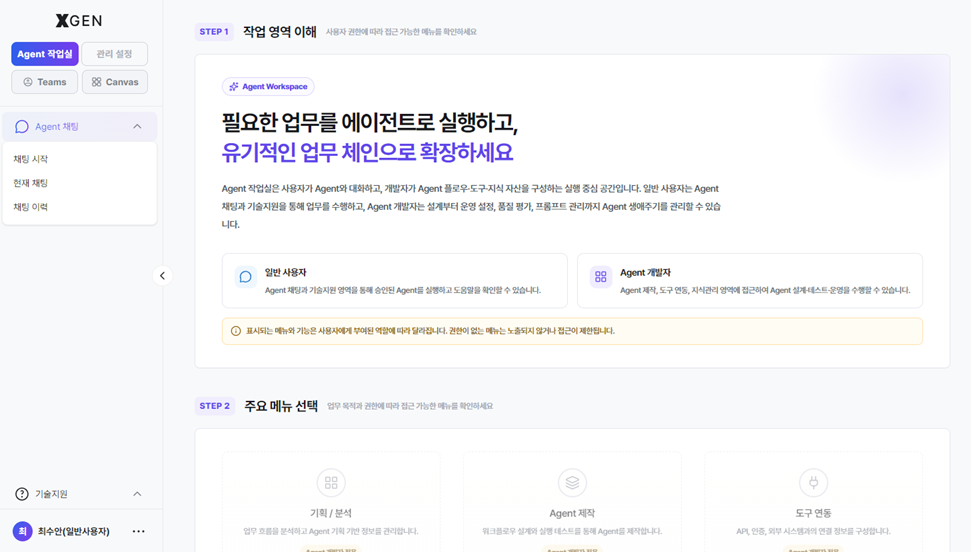
Agent Workspace is the default work area you land in immediately after login. At the top-left, the Agent Workspace button — one of the two mode-switch buttons (Agent Workspace / Admin Center) — is shown active.
- In a web browser, navigate to the address provided by your organization
- Log in with your organization email and password — see Login for procedure details
- After login you land on the Dashboard automatically; the top-left Agent Workspace mode is selected
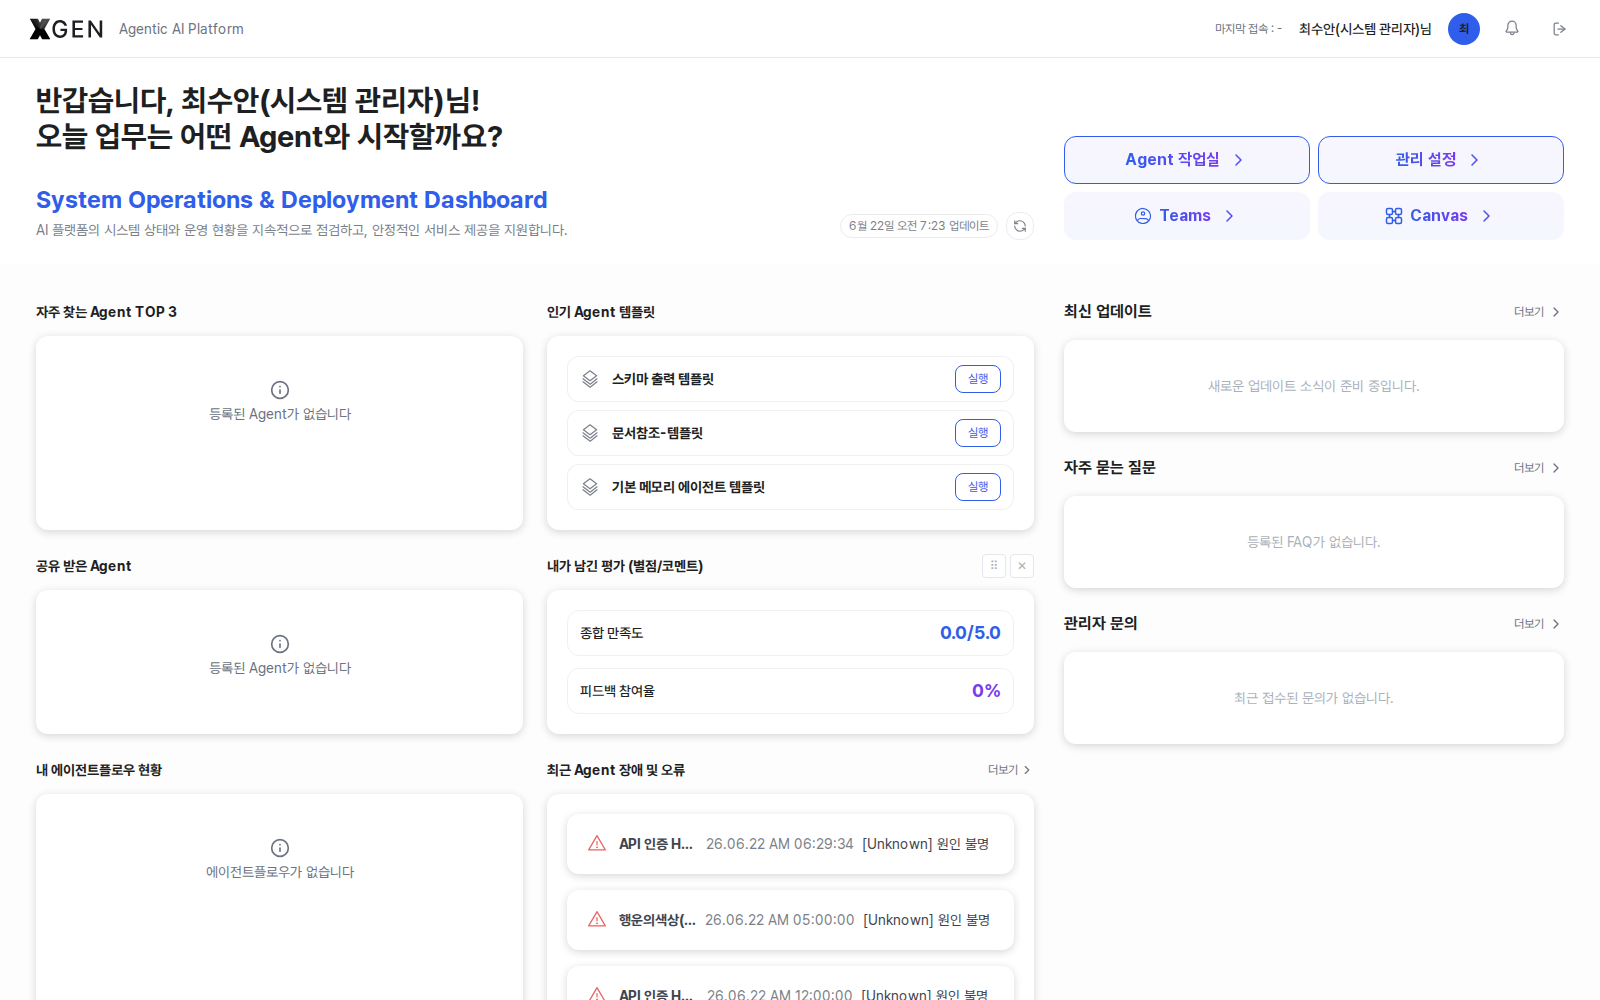
The screen is composed of the following areas.
| Area | Description |
|---|---|
| Top header | Logo, the 2 mode-switch buttons (Agent Workspace / Admin Center) at the top-left, search, notifications, user profile |
| Left sidebar | Main feature menus for user mode (5 sections — see Agent Workspace Layout below) |
| Content | Work area for the selected feature |
| Right panel (when present) | Auxiliary area for help, chat, etc. |
Top-left mode switch — Agent Workspace vs Admin Center
The solution exposes 2 mode-switch buttons at the top-left.
- Agent Workspace — the default work area for end users and Agent developers. This is the area this manual covers.
- Admin Center — a dedicated administration area for system administrators and governance officers. By default it is hidden or disabled for standard users and Agent developers; only menus permitted by the role / permission policy become accessible. For that area, see the Admin Manual.
Some menus may be hidden depending on your permission tier.
User Types in Agent Workspace
The menu scope shown in the Agent Workspace sidebar varies by user type.
| Tier | Korean | What you can do in Agent Workspace |
|---|---|---|
| Standard User | 일반 사용자 | Use the Agent Chat / Technical Support / Dashboard areas. Chat with agents the company has deployed; view announcements/FAQ; submit 1:1 inquiries |
| Agent Developer | Agent 개발자 | All of the above plus Agent Creation / Tool Integration / Knowledge Management / Analysis & Planning areas. Design, deploy, and operate your own agents (permission tier stays Standard User — granted as a separate role) |
The solution uses a two-tier permission model — Standard User and SuperUser. The "Agent Developer" category is operated as additional menu permissions granted on top of Standard User. To upgrade from Standard User to Agent Developer, request the permissions from a SuperUser. Per-role entry points and workflows are summarized in the Task Guide.
Agent Workspace Layout
The left sidebar of user mode (Agent Workspace) is organized into 5 sections (some may be hidden depending on your permissions). Each menu maps to the corresponding chapter in this manual as follows.
| Section | Menu | Permission | Manual Chapter |
|---|---|---|---|
| Agent Creation | Agent Planning | Agent Developer | Agent Planning |
| Agent Creation | Agent Design | Agent Developer | Creating an Agent · Entering Agent Workspace |
| Agent Creation | Agent List | Agent Developer | Agent Operations |
| Agent Creation | Agent Operation | Agent Developer | Agent Operations · Scheduled Automatic Runs |
| Agent Creation | Agent Quality Evaluation | Agent Developer | Agent Quality Evaluation |
| Agent Creation | Agent Prompts | Agent Developer | Prompt Management |
| Tool Integration | API Tools | Agent Developer | API Tools |
| Tool Integration | Authentication Profile | Agent Developer | Authentication Profile |
| Knowledge Management | Knowledge Collections | Agent Developer | Knowledge Management · Collection List |
| Knowledge Management | File Storage | Agent Developer | Knowledge Management · File Storage |
| Knowledge Management | DB Integration | Agent Developer | Knowledge Management · DB Integration |
| Knowledge Management | Upload History | Agent Developer | Knowledge Management · Upload History |
| Agent Chat | Start Chat | Standard User | Using Chat · Starting Chat |
| Agent Chat | Current Chat | Standard User | Using Chat · Current Chat |
| Agent Chat | Chat History | Standard User | Using Chat · Chat History |
| Technical Support (pinned bottom) | Announcements | Standard User | Technical Support · Notice Board |
| Technical Support (pinned bottom) | FAQ | Standard User | Technical Support · FAQ |
| Technical Support (pinned bottom) | 1:1 Admin Inquiry | Standard User | Technical Support · 1:1 Admin Inquiry |
About menu names
Menu names on the screen may differ slightly depending on the solution version and your permissions. This manual is based on Xgen stage / 2.3.0. If a menu is not visible, your assigned permission may not enable it — contact your system administrator.
The Dashboard is not a separate sidebar item: you reach it automatically after login or by clicking the XGEN logo at the top-left. Per-role widget layout is covered in the Dashboard chapter.
First-Time Checklist
A short checklist to run through the first time you use the solution. Each item links to the relevant chapter for the full procedure.
- Verify login — confirm that you can sign in with your account. If you cannot sign in, request account activation from a system administrator.
- Check your assigned permissions — confirm your permission type (Standard User / Agent Developer, etc.) by reviewing the menus shown in the left sidebar. See the Permission Tiers table for criteria.
- Inspect the dashboard — on the Dashboard shown after login, confirm that the widgets matching your role (frequently used agents, shared agents, my agents, etc.) appear correctly.
- Review announcements and FAQ — open the Technical Support menu at the bottom of the left sidebar and check the latest announcements and frequently asked questions (FAQ).
- Run your first chat — in the Agent Chat area, hold a first conversation with a deployed agent to verify basic operation.
Operating Principles
Baseline operational principles to follow when using Agent Workspace.
- Shared Agents — Agents may be reviewed and managed according to operational policy. If an answer is inaccurate or needs further verification, leave feedback via the star icon at the bottom of the response.
- Protect your work — chat content, Prompts, and knowledge assets are tied to your account and managed together with your account activity history. For security, do not share your account or password with others.
- Be careful with sensitive data — before entering personal information (resident registration numbers, account numbers, etc.) or confidential company data in chat, be sure to review your internal information-protection policy. PII auto-masking may apply, but responsibility for whether to enter sensitive data and for policy compliance rests with the user.
- Report issues via 1:1 inquiry — when problems such as screen errors, feature restrictions, or data anomalies occur, file a 1:1 Admin Inquiry. The system administrator reviews submitted reports and responds in order.
When the Screen Does Not Display Correctly
Try the following in order.
- Update your browser to the latest version (Chrome or Edge recommended)
- Clear browser cache/cookies and reconnect
- Try Incognito mode to check if the issue is environment-specific
- If problems persist, contact the Xgen Solution Administrator with a screenshot
Contact
For technical support, please contact the Xgen Solution Administrator.